
I am experimenting with a technique to use packaging to make print plates.
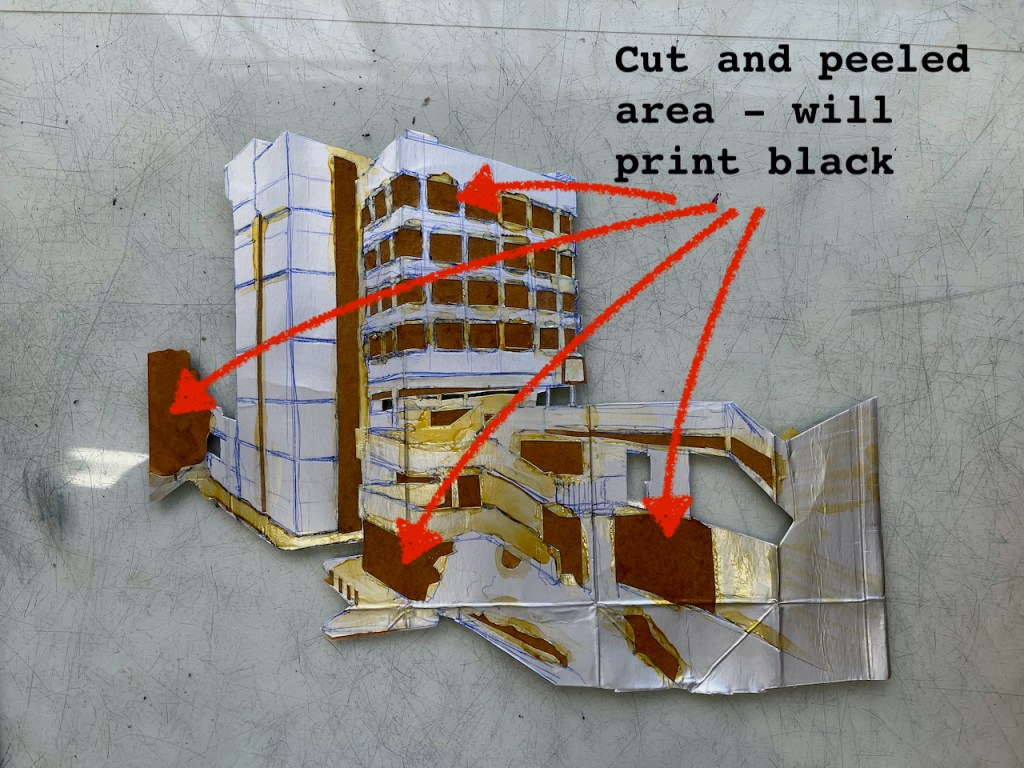
The principle is to use packaging which has a shiny surface on top of cardboard. I remove the shiny surface where I want the print to be dark. For example here is a plate ready to ink up and print:
Here is the basic process:
- Find and flatten the packaging
- Draw the design in ball point pen
- Cut out the outline with scissors
- With a scalpel carefully cut out and peel off the areas to be dark in the print
- Paint the plate with shellac, a varnish, to make it stronger and less absorbent
- Put ink on
- Wipe the ink off
- Make marks in the remaining ink using sticks, bits of cloth
- Print the plate on an etching press
The print process is an intaglio process: the ink is in the dips in the plate.
Here are some short videos of parts of the process (no sound).
Here’s what I’ve learned so far:
- The plates which work best for me are UHT milk cartons, medicine packets (aspirin) and boxes of tissues (Tesco “springforce”). The UHT milk cartons are good because they have a metallic coating on the inside which makes a satisfactory printing surface. They deliver a good contrast between the cut-and-peeled areas and the unpeeled areas. Here is an example of a UHT milk carton plate. The dark areas are the peeled areas which will print black.
- The plates are more absorbent than traditional copper plates. They use a lot of ink.
- The ink I use is traditional oil-based etching ink. I find this works better for me than the “aqua-wash” inks. I use Charbonnel Soft Black or “Shop Mix Bone Black” etching ink from Intaglio Printmaker.
- My plates will yield about 5 or six prints. After that, the definition is no longer very good. Also, bits fall off!
Acknowledgement: I first saw this technique demonstrated by Karen Wicks on instagram @iacartroom
Here is a collection of prints I made by this method:

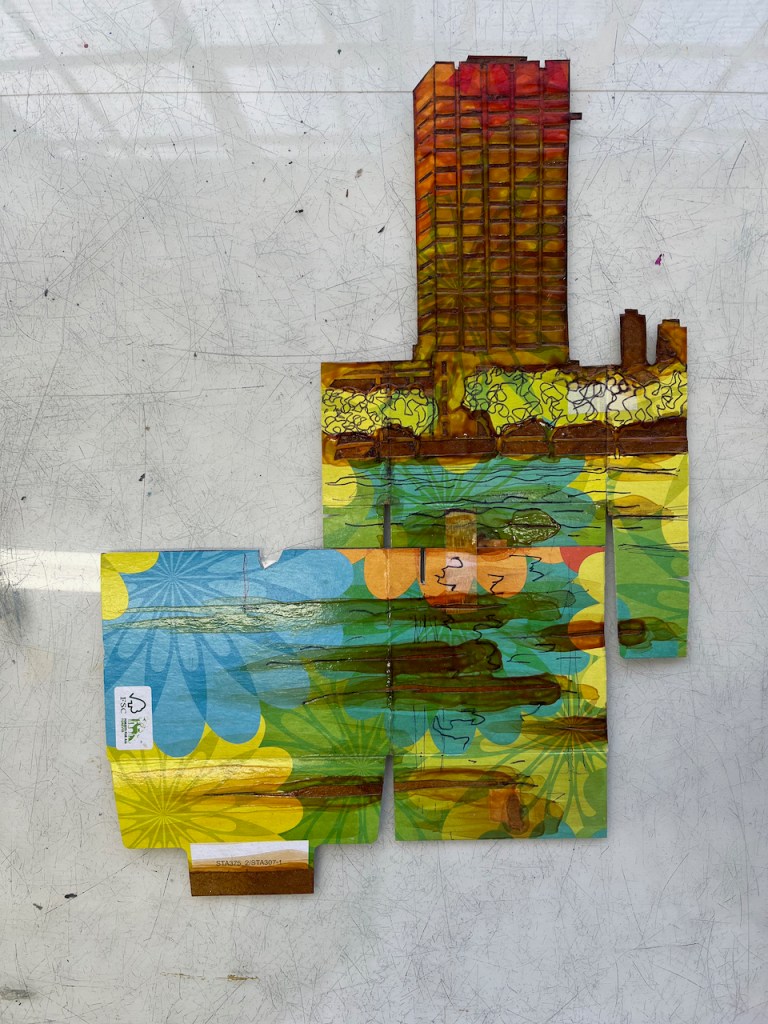
Cornwall Road, London SE1 – packaging print
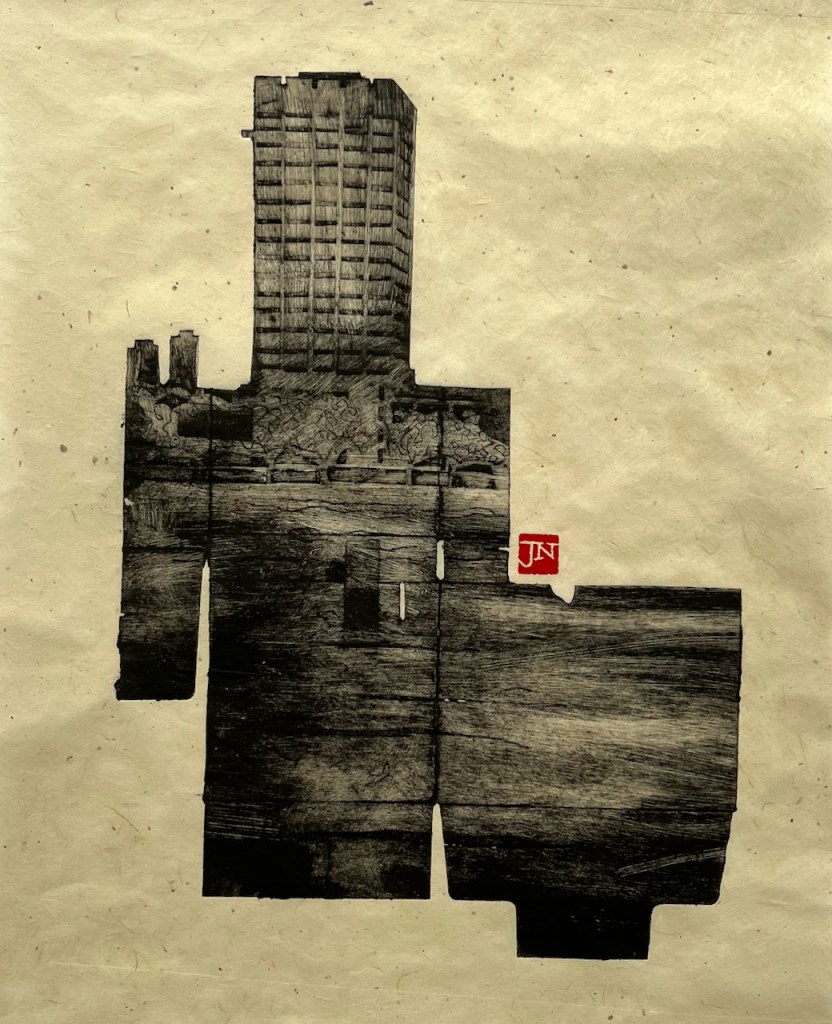
Here is another packaging print. This one shows Bridge ELR-XTD Structure 20 on Cornwall Road (N) between Charing…
Keep reading
Great Suffolk Street, Railway arch
Huge brick arches carry the railway lines into Waterloo Station. Here is a view looking North up Great…
Keep reading


Something went wrong. Please refresh the page and/or try again.
